Thursday, August 16, 2012

Nifty Thrifty Thursday: Jewelry, in bulk

I love my local thrift stores. I also love garage sales, case lot sales, and clearance bins. Thursdays I'm going to share some of my great finds at these places in hopes of inspiring your own craftiness. 

Bring on the bling! I found two vases at Savers filled with jewelry and taped shut. The larger one was priced $4.99 and the smaller $1.99 (plus my 20% coupon for my donation).  I got home, with the "help" of my baby girl emptied out my haul, and I got a bit excited.


You see, the ladies at my church are collecting jewelry to donate to our local elderly care center.  The ladies love to look pretty, but they need necklaces that can slip over their head without clasps. Looking at all the beads in the jar, I just knew I could remake some of them into perfect pieces for them.  A few I'll just donate as is, like the shell leis, and some of the little girly bling my boy wants to sell at our garage sale at a whopping quarter a piece. (He wants to sell everything recently!) Is it wrong of me to want to keep two of them for myself? I've been looking for silver and pearls (actually made two necklaces out of the chain on the far left) and I just loved the green one next to it, too.

The rest are destined for greatness then gifting to the care center!

Here's what I've done so far.

I removed the clasps and added chains to 3 short ones .

There were some really long ones that I was able to make into 2 necklaces each. And twice I was able to take two smaller necklaces and combine and/or re-thread the beads to make them into one longer one.

I also cleaned out my jewelry supplies and created a couple from scratch-- hey I was on a roll.  I hope they enjoy them.

So whether you are gifting or crafting, check and see if your local thrift store has jewelry in bulk!


Tuesday, August 14, 2012

Dinosaur Fun


Today was Two Dollar Tuesday at the Dino Museum.  I packed up the kiddos, and threw in the two neighbor girls for good measure and we headed off to the past.  They loved it. It was crazy crowded but we waited in line and Ooo-ed and Ahh-ed over tiny trilobites and the towering T-Rex.

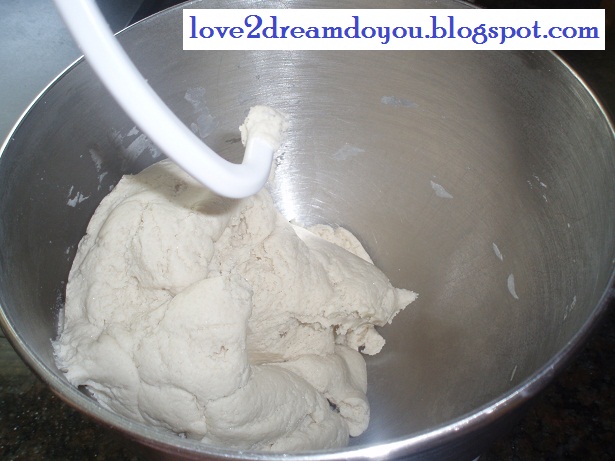
It was a bummer to come home, but our tummies were rumbling. After a quick lunch and google search, I whipped up some salt dough from this recipe.  I thought it would be cool to make some dino bones that they could dig up in the sand box.  Ummm... dino bones take FOREVER to bake.  I had to pick the hottest day of the week to bake salt dough in the oven. After an hour at 275, I called it good enough. 

 
 All mixed up.

 
Shaped

 
Baked. Why didn't the undersides turn white?

 Ready to be buried.

 
 Discovery!


I even joined them in the digging fun.  Go ahead and make some... you know you want an excuse to dig in the dirt. ;)

You could even get more educational and create a grid in the sand box with sticks and string. Recreate that grid on paper and have them mark the correct location where they found the bone. Think we might try that tomorrow. If we do, I'll post some pics.

Happy Diggin'


Editted to add: It is VERY frustrating when you can't find two of the bones even when kid #1 was instructed to only hide them inside a certain marked square. Can't imagine how real paleontologists feel!

Monday, August 6, 2012

Game Time with Siblings!

It's almost 100 out. It's been hot all week. School doesn't start for 3 whole very long (for mom) weeks. My kids refuse to play outside in the heat of the afternoons. I refuse to let them watch tv or play video games all day.  They love board games but sadly we don't have any new ones to tempt them into playing over and over again.
Here's what I did to make board games fun all over for them.


(I very much dislike posting pictures of my kids on-line. I was going to blurr out their faces
but they are just so dang cute!)

Just print off their cuteness on cardstock and attach a binder clip to the bottom. 'Tis the season for school supplies so they are all over... I got my assorted pack from the Dollar Tree. 


If you want extra durability-- kids will be playing with these!-- cover with clear packaging tape or laminate. Use them to make any old board game new and a bit exciting.  Chutes and Ladders and Sorry are my boys favorites right now! 


Beat that summer heat and stay cool inside.
(I'm also thinking this would be a great gift for the Grandparents-- a board game with all the grandkids as game pieces!) Quick and easy, but personal and they'll love it!

Linking up to...
DollarStoreCrafts.com August Craft Challenge sponsored by The Dollar Tree
Crafty Confessions

Monday, July 30, 2012

Sun Bonnet Sue Dish Towels

I'm feeling nostalgic today.  Growing up my mom always had flour sack dish towels with these cute girls sewn in the corner. I loved them. They were a wedding gift from her mother-in-law, my grandma and were showing their age. Fast forward to me getting married.  Grandma called and asked my mom what she could get me for my bridal shower.  I said that I would REALLY love some of her cute Sun Bonnet Sue dish towels. My grandma was thrilled that I would ask for something she could make.  I recieved 6 beautiful handmade towels for my bridal shower.

Fast forward to a hubby who loves to make cinnamon rolls. Did you know cinnamon stains? He uses my towels to cover the rolls as they raise.  How could I not sacrafice one towel for that yummy goodness that he bakes?  However, he doesn't use the same stained towel every time he makes cinnamon rolls, no matter how many times I ask, he always "forgets". So now all but one of my towels are stained and not so pretty looking. *sigh*

Before they are too far gone and have to be tossed, I figure I'd use a pin to the trace a pattern onto a sheet of paper underneath one towel. Then I connected the dots and used the pattern to create new towels since my grandmother no longer can lovingly sew me more.  They were easy to put together and I'm offering the pattern to you. So go ahead and whip some up for gifts or to enjoy their cuteness in your kitchen.

The basic how-to:
Print your pattern and cut out. (Right click on image below and print on 8.5x11 paper)
Pin to your fabric and cut out pattern pieces. (I stack several to cut at once.)
Sew eyelet trim to bottom of skirt.
Pin skirt to corner of towel and using a small zig zag setting stitch around skirt. Trim corner of towel off behind the eyelet trim and lower.
Pin and stitch around bodice and then finally around hat.
Paint (or draw with fabric markers) arms and flower boquet if desired.


Linking up at...
Crafty Confessions

Friday, July 27, 2012

Beach Bag Hide-a-Way

Ok. Technically we were at a waterpark, not a beach.

You have all seen on Pinterest the neat idea to clean out a sunscreen lotion bottle to hide your phone, cards, keys and money in. (I would post the pin here, but it has been hacked by some hungarian site that wants you to buy their stuff. I could NOT find the orignial pin and I refuse to support hackers!).

I prefer the spray cans of sunscreen, so I went off to the store to find the perfect lotion bottle. I hit a bit of a snag. I could not find a bottle with a wide enough neck (or that I could cut wider and not have it interfere with the snap on lid).  What to do?  I looked down below the lotion shelves and BINGO... found the deodorant sticks!

Now after standing in the water slide lines behind that one guy, don't you wish more people brought their deodorant with them to the water park!

After picking out a large one, without a see through cap, I headed home... well, after paying for it-- $1, yep, the dollar store! ;) 

After asking how long it would take Mr.L2D to use up this stick, I realized I really didn't want to wait.  So he just twisted up the stick and pulled out the insides. He pushed the inside stick out through the bottom and cut it off. Then he glued the twist dial back to the bottom. (He actually is correcting me saying that he melted the plastics together-- but you can just glue it, wink, wink.) 


Our park passes, money, and keys fit in it great. Sadly my cell phone wouldn't, so I'll still be on the look out for the right size lotion bottle. This works great for now!

Wednesday, July 18, 2012

$4 Front Door Mat


Front door mats... by golly they are expensive.  Here's a little "cheapy" ($6) I had on the front porch and ain't it tiny. Until I find one I absolutely love and am willing to dish out the dough for, I have to have something.

I went to the Dollar Tree to buy a box of ice cream cones-- did you know cones can go rancid? We pulled ours out of the pantry last night and blech!   I stumbled upon these carpet tiles.  I took up the whole isle laying out the squares in different ways.  I didn't like the square look, but a 2x3 rectangle was too big.  I ended up picking up 3 matching ones and a roll of duct tape.

After measuring and marking the tiles, I used a box knife and cut each one in fourths. 

Then I arranged them as a 3x4 rug. After flipping them over, I duct taped them together. I wasn't too impressed with the Dollar Tree duct tape. I'll see how long it lasts and then I might replace it with some "real" stuff. 


A much better size at almost 1/2 the price!  Wondering if a painted black monogram might look good on it too.  I just might try it.

EDITED TO ADD: It's been a month, and the dollar store duct tape has held up beautifully. Wondering if the sun melted it to the rug better. ;)

Tuesday, July 17, 2012

Circle Skirt...the easy way.

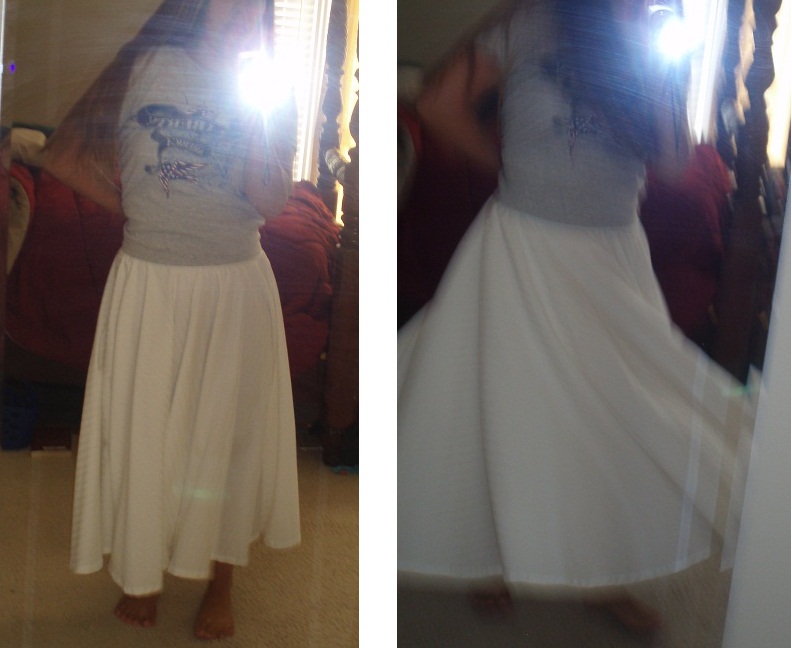
I love the look and... umm... twirliness of a circle skirt, so when I saw this on pinterest, I knew I had to make one-- DanaMadeIt: the Circle Skirt. Except I love easy and will cut corners whenever possible.  I also very much dislike hemming on a curve!  I headed over to the thrift store and picked me out a round tablecloth (Check for stains and wear!!). Now I admit this limits the length of your skirt--unless you want to re-hem it shorter or add a border to the bottom-- but then that negates the easiness of it!.  I chose a 70" round white tablecloth with a subtle stripe and ended up with a mid-calf length skirt on my very tall *wink, wink* 5' 1/2" frame. ;) Wish it was a bit shorter, but not enough to re-hem it! Oh, and it twirls beautifully for that inner little girl in me.

I followed Dana's directions in this tutorial, except I just skipped to the part where I cut the center circle for the waist and attach the elastic.  Then I was done. Super QUICK and EASY!! 

It is impossible (for me) to take a picture of myself in it-- I'm not a photographer and my point-and-shoot has been tossed around by kiddos and is currently being held together with a rubberband. (Christmas is coming, Mr. L2D!) I tried. I really did.

 HaHa...you can laugh! I am.

The 7 year old did better!

 Let's just hang it up outside!

I'm going to be on the look out for cute round end table cloths for when my daughter gets a bit older/taller.  For now, I'll have to hem for hers... yeah, I love her that much!

If you are a sew-er, or an aspiring one, go check out Dana's blog. There are fantastic patterns and tutorial for all sorts of cuteness!